- Home
- Common Knee Injuries
- Calf Tear
- Treatment
Calf Muscle Tear Treatment
Written By: Chloe Wilson, BSc(Hons) Physiotherapy
Reviewed by: KPE Medical Review Board
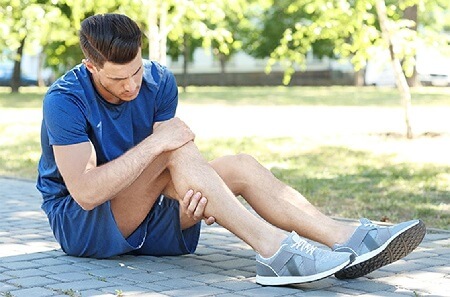
Calf muscle tear treatment can usually be carried out at home with most people making a full recovery.
A pulled calf muscle, aka "calf tear" or "calf strain", is a really common injury where one of the calf muscles gets overstretched causing some of the muscle fibres to tear.
There are three different grades of calf strain, classified by what proportion of the muscle is torn. Calf muscle tear treatment will vary depending on the grade of damage.
Here we will look at the rehab and recovery process with calf muscle tear treatment and what you can do to ensure a full, timely recovery without risking re-injury.
What Is A Calf Muscle Tear?
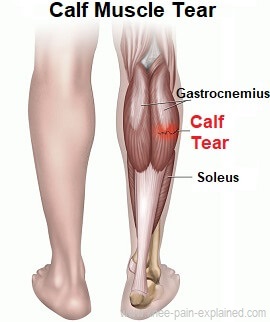
The calf region is made up of two muscles that joint together to form the achilles tendon which attached to the back of the heel:
- Gastrocnemius: the larger, superficial calf muscle
- Soleus: the smaller, deeper calf muscle
The calf muscles work together to pull the foot downwards (think "good toes" in ballet!) and are what give us the propulsive power to go up on to tiptoes, run and jump.
Calf muscle tears can develop:
- Suddenly: when the calf muscles are suddenly overstretched or overloaded - most common. Common in sports with sudden acceleration or direction changes e.g. sprinting & jumping, particularly when sudden bursts of speed from a stationary position feature heavily e.g. football, soccer, basketball.
- Gradually: with repetitive overuse of the calf muscles, particularly if they are already slightly weak or tight. Typically affects runners.
You can find out more about the different causes and risk factors for calf muscle tears in the Pulled Calf Muscle article.
Calf Tear Classification
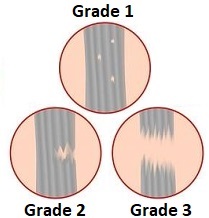
There are 3 grades of calf tear depending on the amount of damage sustained:
- Grade 1: <10% of muscles fibres are torn
- Grade 2: 10-90% of muscles fibres are torn
- Grade 3: Complete tear/rupture of the muscle
You can find out more about the differences between these grades in the pulled calf muscle article.
Calf Tear Symptoms
Typical symptoms of calf muscle tears include:
- Pain: Sudden, intense pain in the back of the calf
- Swelling and Bruising
- Difficulty Walking: or pushing up onto tiptoes
- Tenderness: to touch or any pressure over the torn region
- Palpable Gap: or lump in the calf with grade 2-3 tears
Calf tear symptoms will vary in intensity depending on the extent of the damage.
Find out more about calf tear symptoms for each grade of calf tear.
Calf Muscle Tear Treatment
Treatment for a pulled calf muscle should be started as soon as possible to ensure it is most effective.
Calf muscle tear treatment aims to:
- Protect From Further Injury: It is really important to protect the injured area in the calf - the last thing you want is for more of the muscle fibres to tear
- Aid Healing: speed up healing by bringing in the necessary healing nutrients and getting rid of swelling and inflammatory chemicals
- Realign Muscle Fibres: As part of the healing process, the torn muscle fibres start to knit back together, and cross fibres form between the torn areas. It is important to make sure that as the cross fibres form, they are properly positioned and aligned otherwise you can get lumps of scar tissue in the muscle that reduce calf flexibility and strength
- Ensure Full Recovery: it's important to pace the recovery process and keep going with calf muscle tear treatment until the muscle has fully healed else there is a high risk of re-injury, approx 30%.
- Prevent Long-Term Problems: such as ongoing tightness and/or weakness in the calf muscles which puts it at high risk of re-injury
Let's have a look at the best calf muscle tear treatment options, how they work and what treatments work best for the different grades of calf tear.
1. Rest
Calf muscle tear treatment should ALWAYS start with rest, whatever grade calf strain it is.
It sounds simple, but rest is vital to rest to allow the calf muscles to heal and to prevent the injury getting worse.
Returning to activity too soon can turn a grade 1 calf muscle tear into a grade 2 or a grade 2 to a grade 3.
In the rest phase of calf muscle tear treatment it is really important to avoid any activities that cause pain and not to stretch the muscle.
You will probably need to rest for 2-3 days with a grade 1 calf strain, and up to 2-3 weeks with a grade 3 calf muscle tear.
Stretching exercises should be avoided after a calf tear until you can plantarflex your foot against resistance without pain e.g. pushing up onto your tiptoes.
Do not return to sport until you are pain-free and have been given the all clear by your doctor or physical therapist or else you risk further injury.
2. Ice Treatment
Regularly applying ice packs to the injured calf is a vital part of calf muscle tear treatment and should be started as soon as possible.
Ice is an invaluable part of treatment for calf tears as when used correctly, it helps to:
- Reduce Swelling: Regularly applying ice helps to reduce the amount of bleeding and fluid that pools around the torn calf muscle fibres
- Reduce Pain: ice has an analgesic affect, which helps to reduce the amount of pain felt
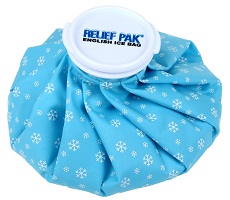
Both of these help to speed up healing as they reduce the amount of fluid and inflammatory chemicals that irritate the damaged area. This enables you to get moving again quicker to build up the strength and flexibility in the calf muscle.
But it's not as simple as simply whacking a bag of frozen peas on your calf and leaving it there until you've had enough. In fact, using ice incorrectly can actually make things worse.
When using ice for calf muscle tear treatment:
- If possible, use a specially designed ice pack. If not, opt for frozen veg or ice cubes
- Always wrap ice packs, cubes or frozen veg in a towel - never place them directly onto your skin
- Place the ice pack over the affected area for 10-15 minutes
- Always leave at least 2 hours between applications of ice
- Aim to apply ice at least 3-4 times a day for the first few days after injury
Q. But can't I just leave the ice pack on as long as I like after a calf muscle tear? That's a definite no-no!
If you apply ice for too long, it can:
- Cause an ice burn
- Prevent the "good" healing nutrients from reaching the torn muscle fibres thus slowing healing
- Prevent the "bad" inflammatory chemicals and fluid being able to drain away, also slowing healing
- If the blood vessels get too cold for too long, rather than constricting and reducing bleeding in the area, they actually dilate (get wider) causing more blood and fluid to accumulate, the exact opposite of what you want the ice to do.
To find out more about how to use ice safely and effectively, visit the ice treatment section.
3. Compression Bandage/Support
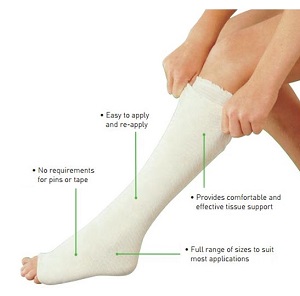
Another useful tip in the early stages of calf muscle tear treatment is to wear a compression bandage such a tubigrip or a specially designed calf wrap.
Tubigrip compression bandages helps to:
- Reduce Swelling: by reducing blood flow to the calf and
- Provide Support: to the pulled calf muscle, reducing the risk of further injury from overloading the damaged muscle.
NB Tubigrip should not be worn at night.
To find out more about how tubigrip works and what size is right for you, check out our tubigrip compression bandage article.
4. Elevation
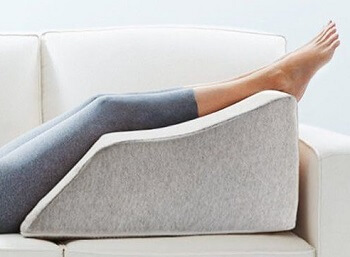
Elevating the calf area should be part of everyone's calf tear treatment plan.
Keeping the injured calf raised and supported above the level of the heart helps to reduce swelling as gravity draws the excess fluid away from the calf.
In the first few days after a calf muscle tear, anytime you are sitting or lying down, prop your leg up rather than letting it hang down.
Top Tip: Make sure that the back of the knee is supported when in this position otherwise your knee will very quickly get stiff and sore!
5. Heel Pads
Heel pads are a MUST for anyone with a pulled calf muscle. Wearing a heel pad in your shoe helps to raise the heel and therefore decreases the tension through the calf muscle. This reduces the risk of further injury and allows the calf tear to heal.
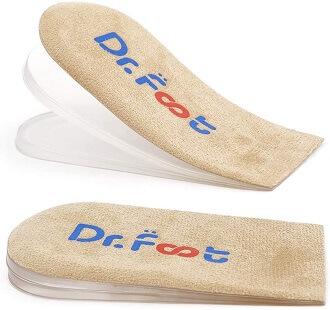
When using heel pads for calf muscle tear treatment, what you really want is adjustable heel pads.
It used to be that you needed to see a physical therapist or podiatrist for custom made heel pads - I've made a fair few in my time!
But nowadays there are some really good, medically approved, adjustable heel pads that do the job brilliantly, and they only cost $10/£12 at Amazon.
The big advantage of adjustable heel pads is that you can adjust how much lift there is under your heel, so you can control much tension you take off the injured calf muscle.
In the first few days after a calf muscle tear, you want to avoid any tension at all through the torn calf muscle to make sure the tear doesn't extend further, so you need a reasonable height to your heel pad, probably around 1".
Once the muscle starts to knit back together and the pain subsides, you can start to gradually reduce the height of the heel pad. This helps to very gently stretch the muscle out and ensure the muscle fibers heal in the right position.
With adjustable heel pads, you simply remove one of the layers, reducing the height being guided by how it feels in your calf.
By slowly reducing the height of the heel pad, you give the muscle a chance to stretch out properly without overloading it or risking further injury.
Top Tip: You should always wear a heel pad in both shoes otherwise you will end up with one leg slightly longer than the other which can lead to back & knee problems.
Heel pads are a simple but vital and often under utilized tool with calf muscle tear treatment and are readily available on Amazon >
6. Medication
Your doctor may advise medication to help reduce the pain and inflammation as part of your calf muscle tear treatment.
Over the counter medication such as paracetamol/acetaminophen is usually sufficient for a pulled calf muscle.
Anti-inflammatory medication such as ibuprofen/Advil is NOT advised for at least the first 2-3 days after a calf muscle tear as it is thought to slow healing.
Always consult your doctor before taking any medication.
7. Crutches
You may need to use crutches for a few days to keep the weight off your leg and prevent further damage to the strained calf muscle. If it's a grade 3 calf tear, it may take a few weeks before you are confident to get around without crutches.
Crutches should be provided by a health care profession to ensure they are the right height for you and so they can teach you how to safely move around with crutches with your pulled calf muscle.
Make sure you check out our top tips for getting up and down the stairs with crutches.
8. Walker Boot
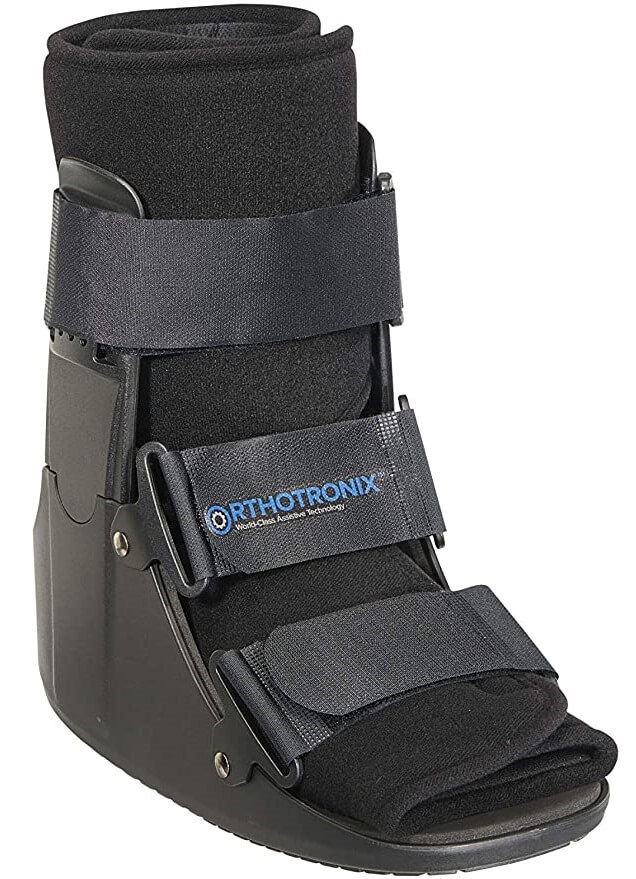
In some cases your doctor may recommend you that you wear a walker boot for calf tear the first 3-4 weeks after a grade 2 or 3 calf tear.
A walker boot holds your ankle at 90 degrees in a neutral position and is thought to speed up healing as well as reduce the risk of further injury.
A walker boot for calf tear may also incorporate a heel lift pad for added comfort. They cost around $40/£35 and are readily available from Amazon >
You can take as much weight as you like through your injured leg, be guided by pain. People often use crutches initially with a walker boot, partly to take the weight off their pulled calf muscle but also to help with balance as it can feel a little strange at first walking with your foot in a fixed position.
9. Calf Exercises
Calf muscle tear rehabilitation is at the core of the treatment process and is really important to ensure you make a full recovery from your calf muscle tear.
In the early stages after a pulled calf muscle, you must rest and not do any activities that cause pain. The muscle fibres need time to heal and knit back together. Stressing them too early will at best, slow healing but could even cause further damage and tearing.
It is also really important to continue calf strain rehab even once your symptoms have settled until you have regained full strength and flexibility in your calf and feel confident doing all your usual activities. If you quit too soon, you are at high risk of future calf strains.
So what are the best exercises to do for calf muscle tear rehabilitation? Let's have a look.
Movement Exercises
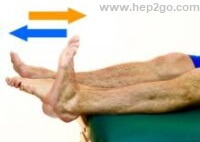
The first stage of calf muscle tear rehabilitation is gentle mobility exercises to get the knee, ankle and foot moving. This prevents any stiffness setting in and starts to get a little bit of movement through the injured calf muscle without overloading it.
These can be done anytime you are resting and you don't need to put any weight through the injured calf so there is no risk of aggravating things.
Strengthening Exercises
Strengthening exercises are a really important part of calf muscle tear treatment. Graded strengthening exercises help put the right stresses and strains through the muscles so they can heal properly without overloading them and causing more damage
Resistance Exercises
When appropriate, resistance exercises e.g. using theraband are important as they help the muscle fibres to align properly as they heal and prevent the build-up of scar tissue.
Balance Exercises
Balance is often affected with a pulled calf muscle leaving us prone to more injuries in the future if it is not regained
A good test to see whether you should include balance exercises in your calf muscle tear rehabilitation is to stand on one leg and see if you can keep your balance. Compare how long you can stand on your injured leg to your uninjured leg.
If there is no difference, try again but this time close your eyes - you'll be amazed how much harder it is!
The aim is to be able to stand on one leg for around a minute with your eyes closed.
Calf Stretch Exercises
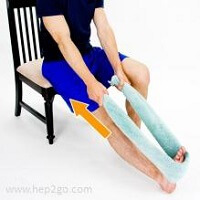
Calf stretches are one of the later parts of calf muscle tear treatment. You usually need to wait at least 2-3 weeks before starting calf stretches after a pulled calf muscle.
A good test to see if you are ready to start calf stretches is to try pushing up onto your tiptoes when standing. If there is no pain, repeat 20 times.
If there is still no pain, repeat but this time, standing only on the injured leg. If you can do this 20 times with no pain, then you are ready to start calf stretches.
It is important to start slowly with calf stretches, to stretch each of the calf muscle separately, and to do stretches in different positions, both weight bearing and non-weight bearing in order to regain full flexibility and function.
Dynamic Exercises
Once you have regained strength and flexibility in the calf you can start activity related exercise such as using a static bike, leg press and treadmill, and once you feel confident, you can start jogging and then sports training.
Your doctor or physical therapist will be able to offer guidance on when you can return to sports.
10. Friction Massage
Deep transverse friction massage, aka cross friction massage, involves massaging in a transverse direction over the affected area. It helps to maintain mobility, stretch the muscle, boost blood flow, prevent scar tissue and adhesion formation and break down unwanted cross-fibres.
Cross friction massage should be carried out by a physical therapist and is a really effective calf muscle tear treatment, whatever grade tear. The method used will vary depending what stage of calf tear recovery you are in.
Deep transverse friction massage is different to a sports massage and when done correctly, shouldn't be painful.
11. Ultrasound
Your physical therapist may also recommend calf muscle tear ultrasound treatment to help promote healing after a pulled calf muscle.
It is thought that ultrasound helps to improve blood flow to the damaged calf area area and breakdown any cross-fibres that have formed in the muscle allowing the collagen fibres to heal in the correct alignment to ensure good strength and flexibility in the muscle.
The application is very similar to ultrasound scans in pregnancy, using gel, but a different frequency is used with calf muscle tear ultrasound treatment.
12. Calf Tear Surgery
Surgery is rarely indicated for calf muscle tear treatment as the muscles do not tend to fully separate. In most cases, whatever grade, the muscle will knit back together on its own over a few weeks.
If this fails to happen or the calf rupture is severely impacting function, an orthopedic surgeon can sew the two sections back together.
What Treatment Is Right For Me?
As we have already mentioned, calf muscle tear treatment depends on how badly the muscle has been torn and how quickly it is healing.
Grade 1 Calf Tear Treatment
For a grade 1 calf muscle tear treatment can usually be done at home using a combination of:
- Rest: typically 2-3 days
- Ice
- Elevation
- Heel Pads: not always needed
- Exercises: can typically start after 2-3 days
It usually takes 2-3 weeks to recover from a grade 1 calf tear. If things fail to settle it would be worth seeing a physical therapist as you might benefit from some friction massage and ultrasound.
Remember, you will need to keep going with your exercises for around 3 months.
Grade 2 Calf Tear Treatment
During the grade 2 calf muscle tear recovery period, treatment goes that bit further and typically includes:
- RICE: Rest (for around 1 week), Ice, Compression & Elevation
- Crutches: for the first few days
- Heel Pads: for approximately 2-4 weeks
- Walker Boot: in some cases
- Calf Exercises: can typically start after 5-7 days
- Friction Massage
- Ultrasound Treatment
People typically need to rest completely for around a week and it usually takes 6-12 weeks to recover from a grade 2 calf tear.
Again, you will need to continue with your calf muscle tear rehabilitation program for 3-4 months to ensure full calf tear recovery.
Grade 3 Calf Tear Treatment
Grade 3 calf muscle tear treatment starts the same as with grade 1 and 2 tears, but healing takes longer and in some cases surgery may be necessary. Grade 3 calf muscle tear treatment usually consists of:
- RICE (rest, ice compression, elevation): typically for 1-2 weeks
- Medication
- Crutches: 2-4 weeks
- Walker Boot: 2-4 weeks
- Heels Pads: typically for 3-6 weeks
- Physical Therapy: including friction massage
- Ultrasound
- Rehabilitation Exercises: follow the guidance of your physical therapist
- Surgery: minority of cases
Grade 3 calf tear recovery time is usually around 3 months but it can take up to 6 months to return fully to competitive sports.
Possible Complications
Whilst a calf muscle tear in itself is not usually a serious problem, there are a couple of things to watch out for:
- Achilles Tendon Rupture: Sometimes a rupture of the achilles tendon is incorrectly diagnosed as a calf tear. An achilles tendon rupture is a much more serious condition requiring immediate medical intervention. If you are physically unable to rise up onto your tiptoes, always get checked out by your doctor.
- Deep Vein Thrombosis aka DVT: With a calf muscle tear, you are at increased risk of developing a blood clot, due to the bleeding in the calf area. Signs of a DVT include intense calf pain, skin redness and warmth, swelling, throbbing/cramping sensation and tenderness to touch. A DVT is a medical emergency so if you suspect you have one, you must consult a doctor immediately.
What Else Can Help?
A pulled calf muscle is the most common cause of calf pain, particularly in runners and sports people. Early calf muscle tear treatment helps to speed up healing and reduce the risk of further injuries.
Other causes of calf muscle pain include:
- Calf Muscle Cramps
- Bakers Cyst
- Achilles Tendonitis
- Trapped Nerve
- DVT
- Calf Muscle Weakness and/or Tightness
- Peripheral Vascular Disease
You can find out loads more about the causes, symptoms, diagnosis and treatment of each of these in the calf muscle pain section, or by using the links above.
Key Takeaways
- A pulled calf muscle is a common problem particularly for runners and athletes
- The sooner you start calf muscle tear treatment, the better your recovery will be
- Rest is the vital first step when recovering from a calf tear. Doing too much too soon risks further damage
- Calf tear recovery time will be anything from 2 weeks for a grade 1 calf tear and up to 3-6 months for a grade 3 calf tear
- Exercises are key during the calf muscle tear recovery period, and it is really important not to start stretching too soon
- There are a whole range of calf muscle tear treatment options that when used correctly in combination will in most cases lead to a full recovery so you can get back to doing all the things you love.
Page Last Updated: 13/01/23
Next Review Due: 13/01/25
Related Articles
Knee Pain Running
February 2, 2026
Diagnosis Chart
January 12, 2026
Resistance Band Exs
December 7, 2023

